VyOS Deployment on Azure
This manual provides detailed step-by-step instructions for deploying a VyOS instance and required resources (Virtual Networks, Network Interfaces, Subnets, Security Groups) on Azure via the Azure Portal.
Prerequisites for Deploying VyOS on Azure
Azure Account
Ensure you have an active Azure subscription.
Microsoft Entra ID Permissions
To manage resources in Azure Entra ID (formerly Azure AD), you need appropriate permissions to handle Virtual Networks, Public IP Addresses, Subnets, and Virtual Machines.
Reference Documentation:
https://learn.microsoft.com/en-us/entra/identity/role-based-access-control/manage-roles-portal
https://learn.microsoft.com/en-us/azure/role-based-access-control/role-assignments-portal
https://learn.microsoft.com/en-us/azure/role-based-access-control/overview
Deployment Steps
Step 1: Create a Resource Group
A resource group is a container that holds related resources for an Azure solution. The resource group can include all the resources for the solution, or only those resources that you want to manage as a group.
Create resource groups
Go to the Azure Portal https://portal.azure.com/.
Sign in with your Azure account credentials.
In the portal, search for and select Resource groups.
Select Create.
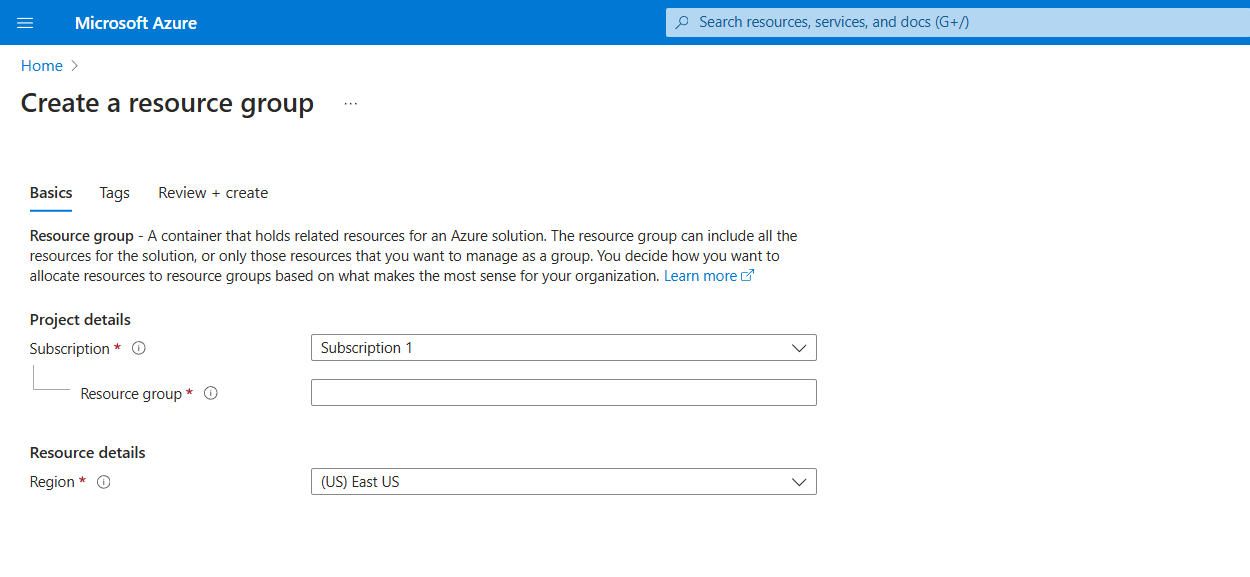
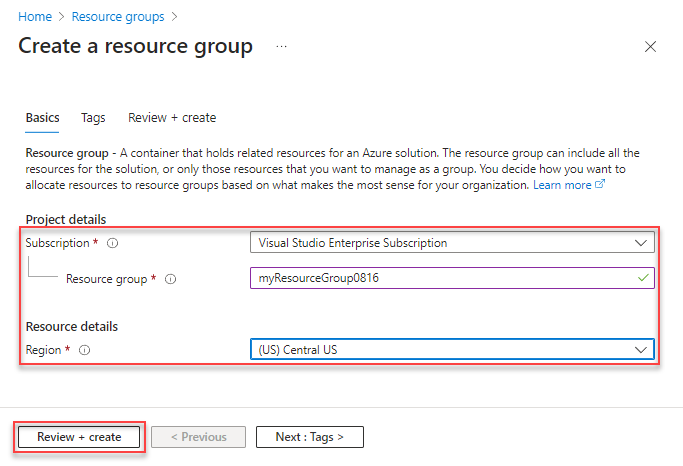
Enter the following values:
Subscription: Select your Azure subscription.
Resource group: Enter a new resource group name, e.g.,
VyOSResourceGroup.Region: Select an Azure location, such as Central US.
Select Review + Create
Select Create. It takes a few seconds to create a resource group.
Step 2: Create a Virtual Network (VNet) and Subnets
Sign in to the Azure portal with your Azure account https://portal.azure.com/
In the portal, search for and select Virtual networks.
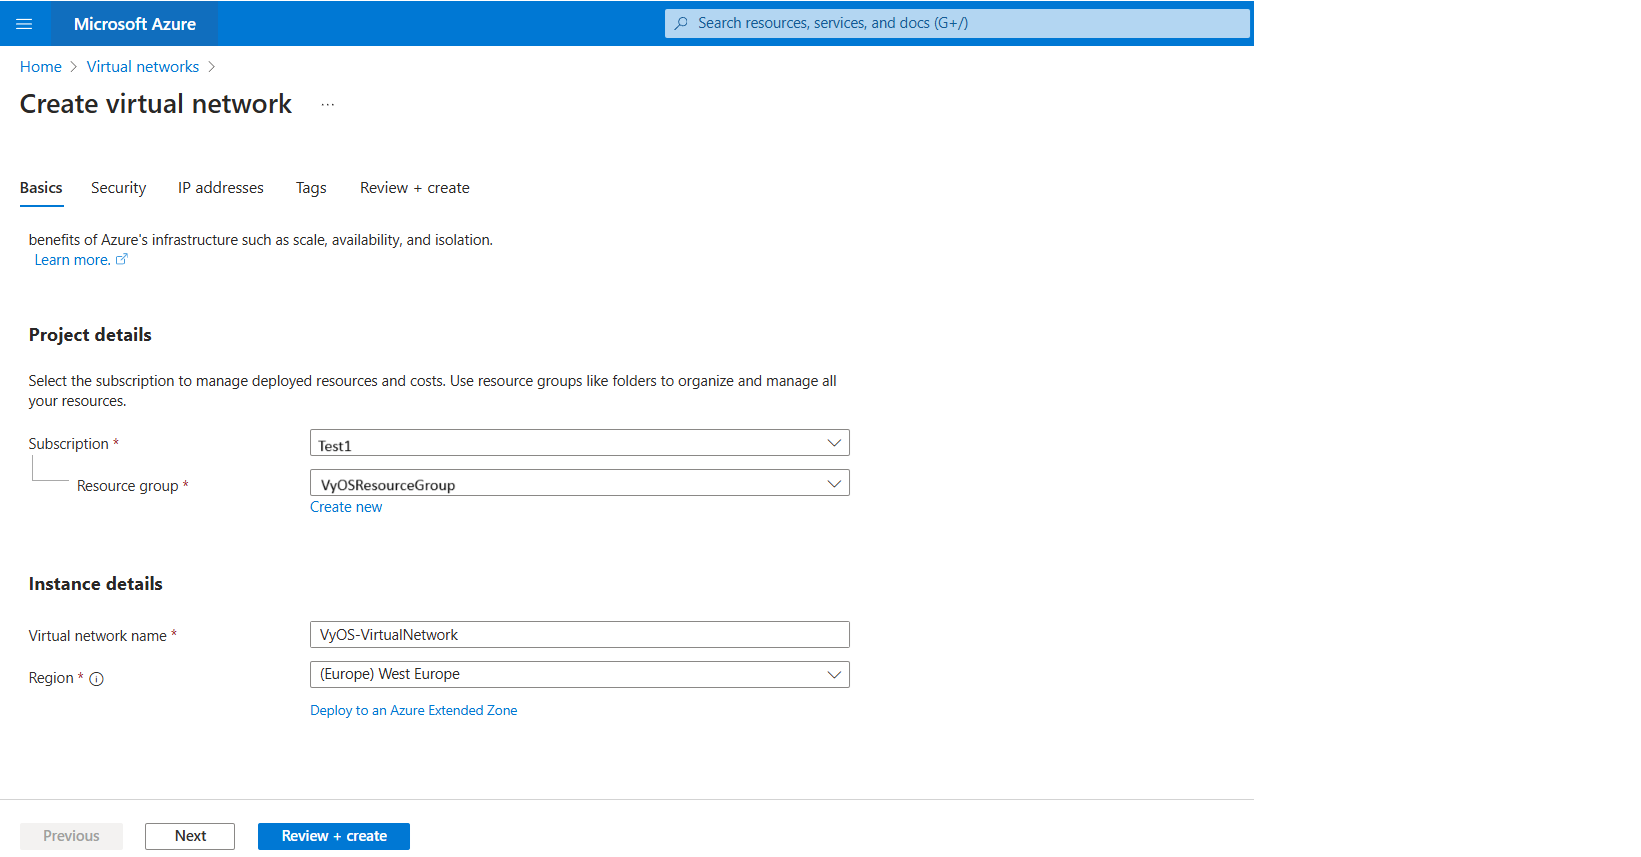
On the Virtual networks page, select + Create.
On the Basics tab of Create virtual network, enter, or select the following information:
Subscription: Select your Subscription
Resource Group: Select e.g.,
VyOSResourceGroupName: e.g.,
VyOS-VirtualNetworkRegion: e.g.,
West Europe.
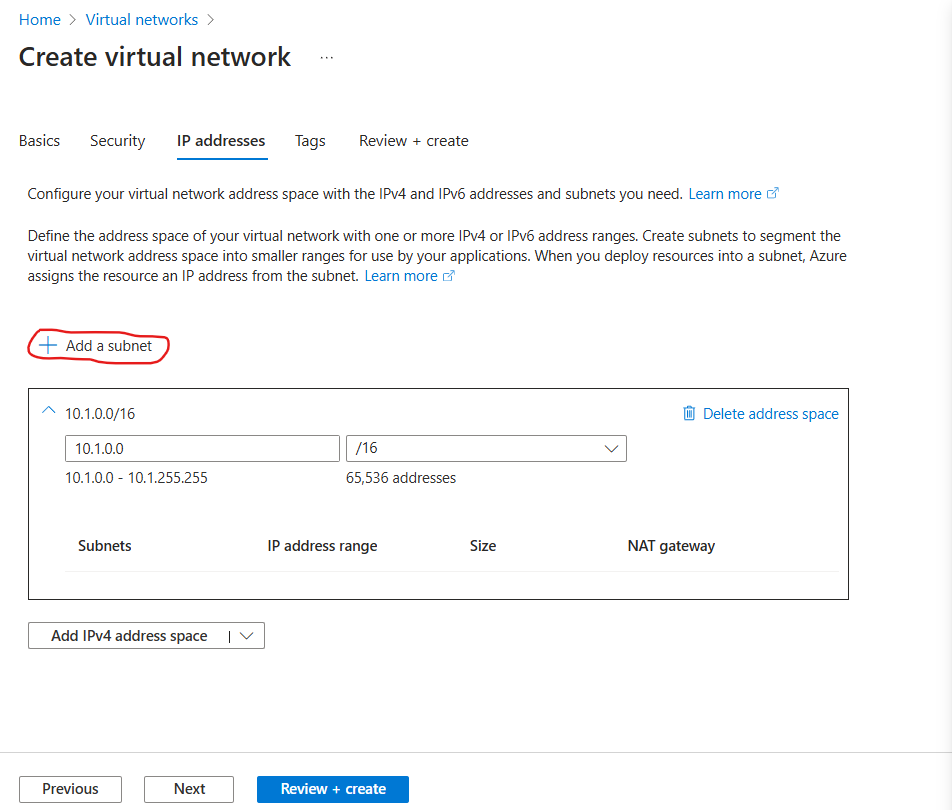
IP addresses:
Address Space:
10.1.0.0/16
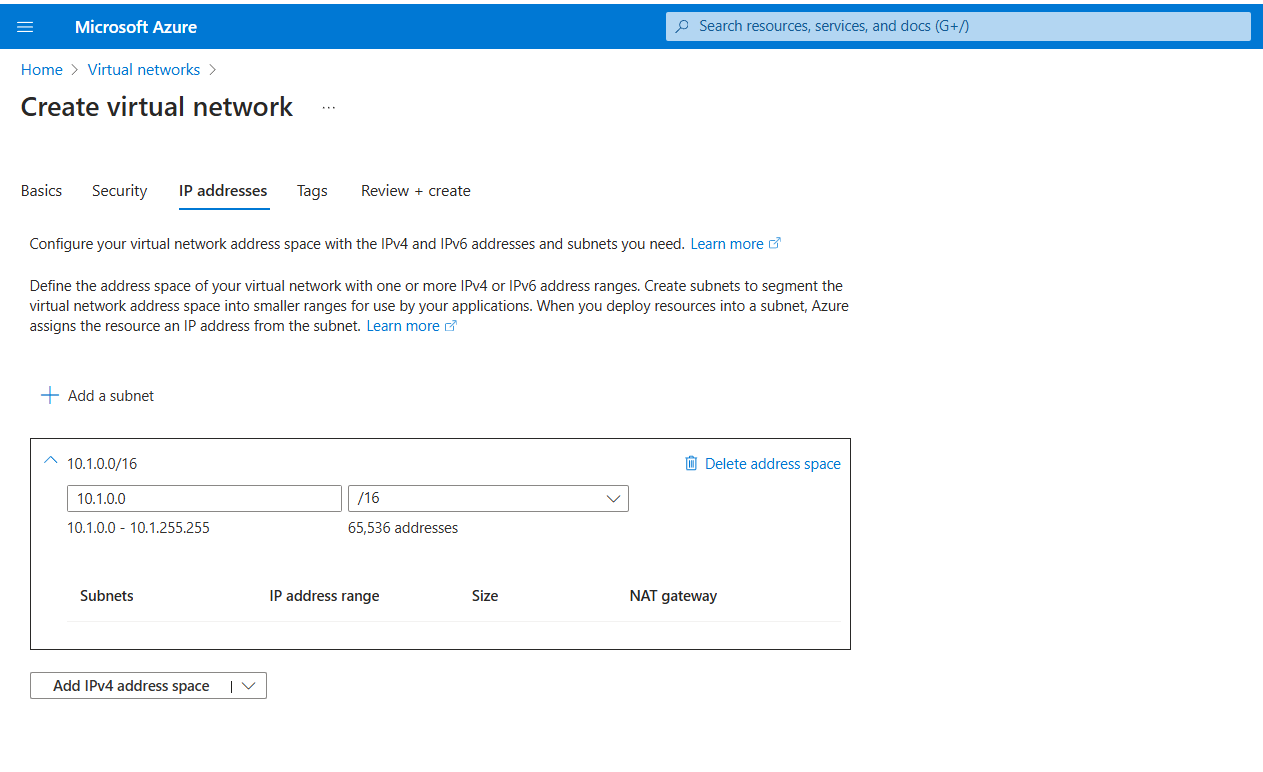
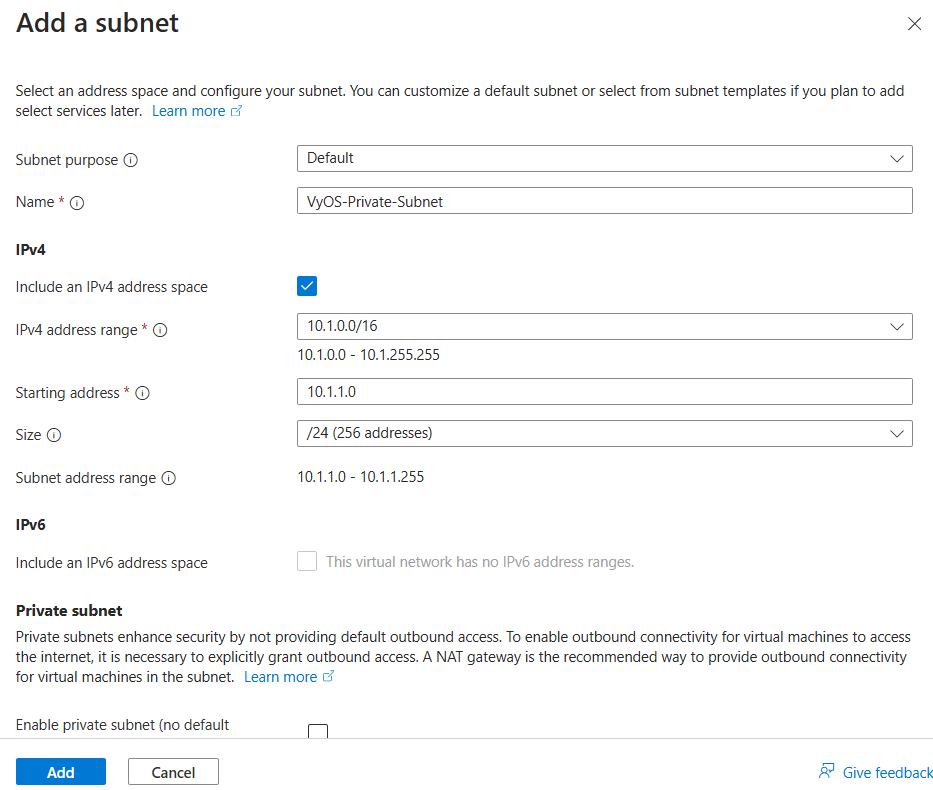
Add two subnets:
Name: e.g.,
VyOS-Private-SubnetStarting address: e.g.,
10.1.1.0Size:
/24Name: e.g.,
VyOS-Public-SubnetStarting address: e.g.,
10.1.11.0Size:
/24
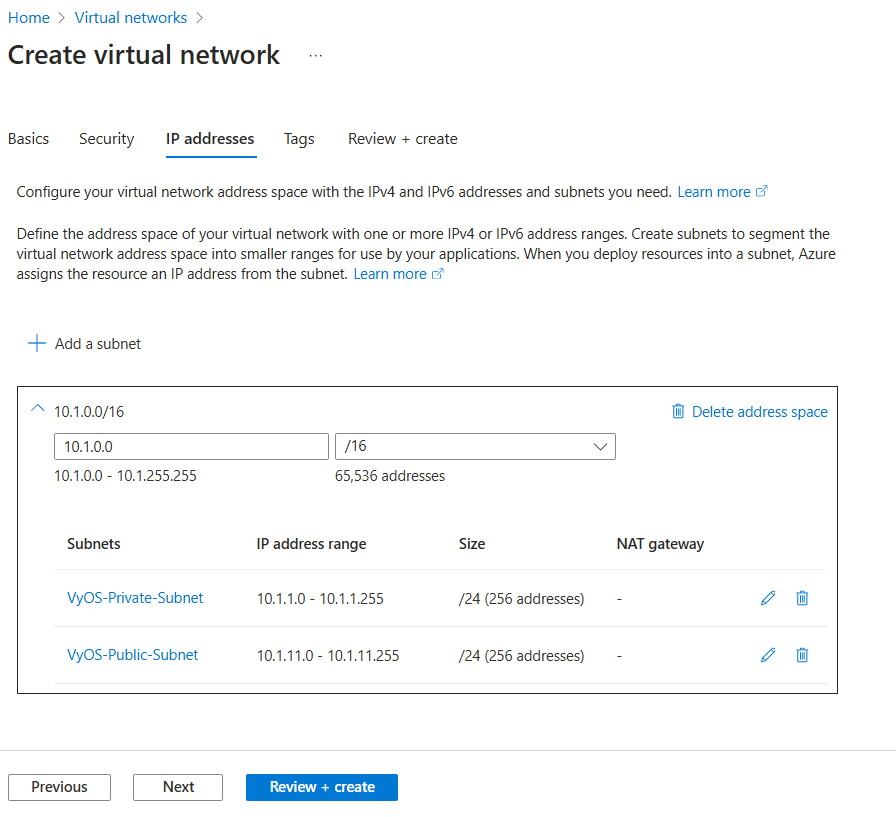
Click Review + Create and then Create.
Step 3: Create and configure Network Security Group (NSG)
In the Azure Portal, search for and select Network Security Groups.
On the Network Security Groups page, select + Create.
Enter the details:
Subscription: Select your Subscription
Resource Group: Select
VyOSResourceGroupName: e.g.,
VyOS-SecurityGroupRegion: e.g.,
West Europe.
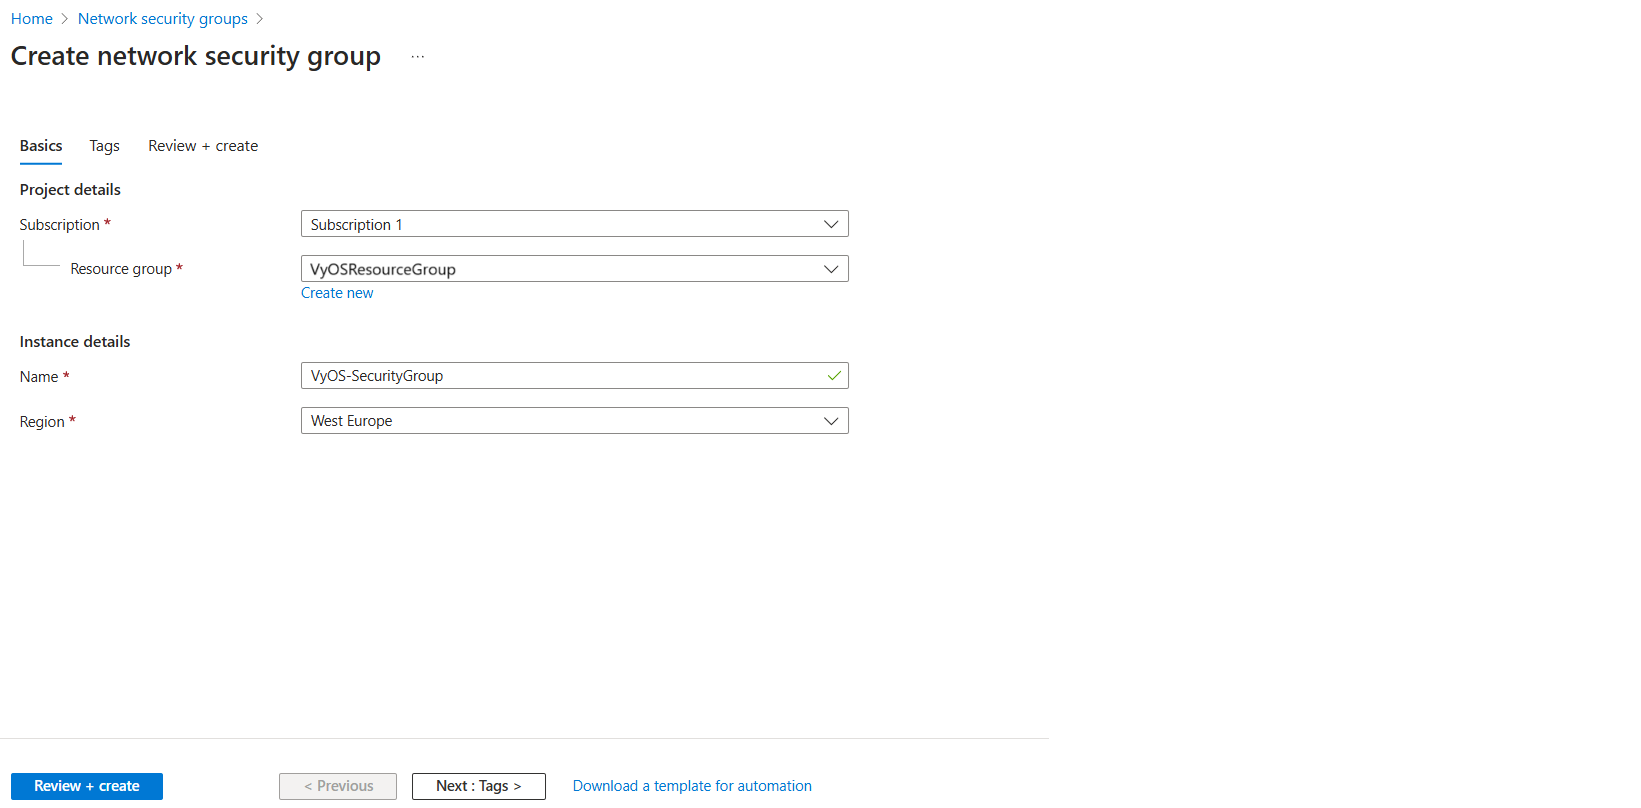
Click Review + Create and then Create.
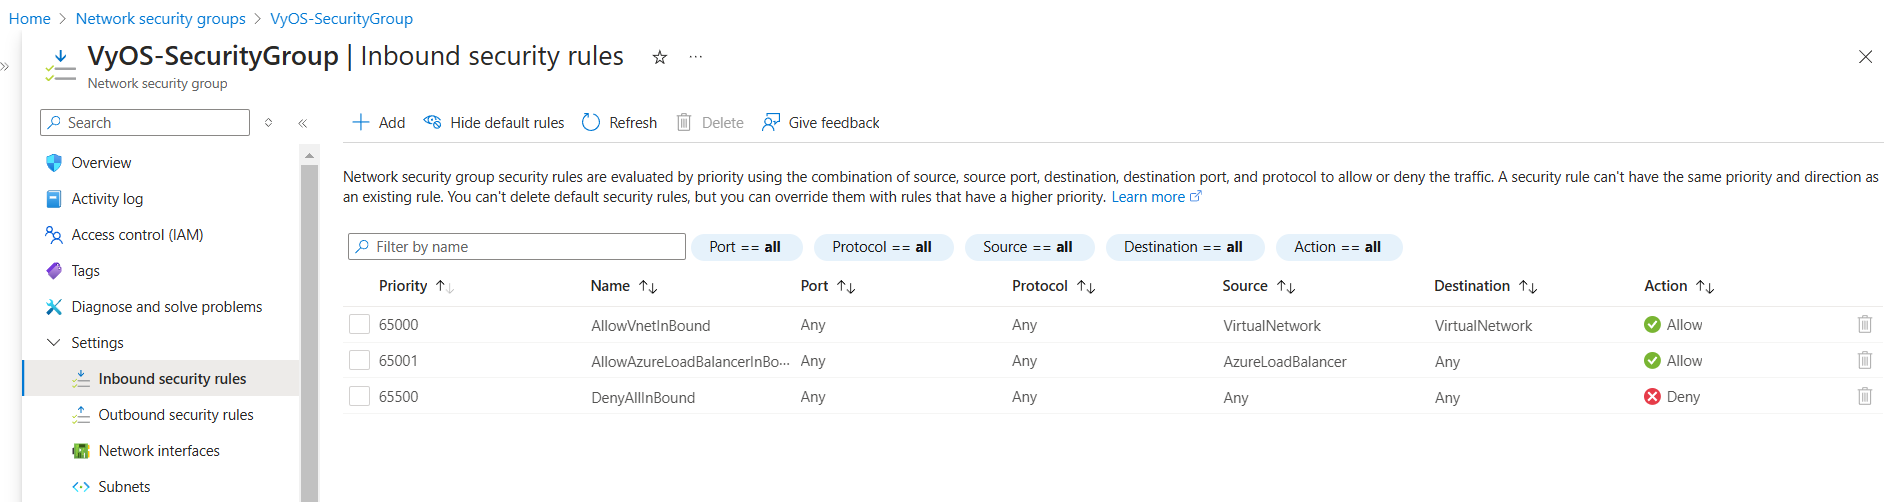
Add inbound rules:
Navigate to the Network Security Groups select VyOS-SecurityGroup go to Inbound security rules under Settings
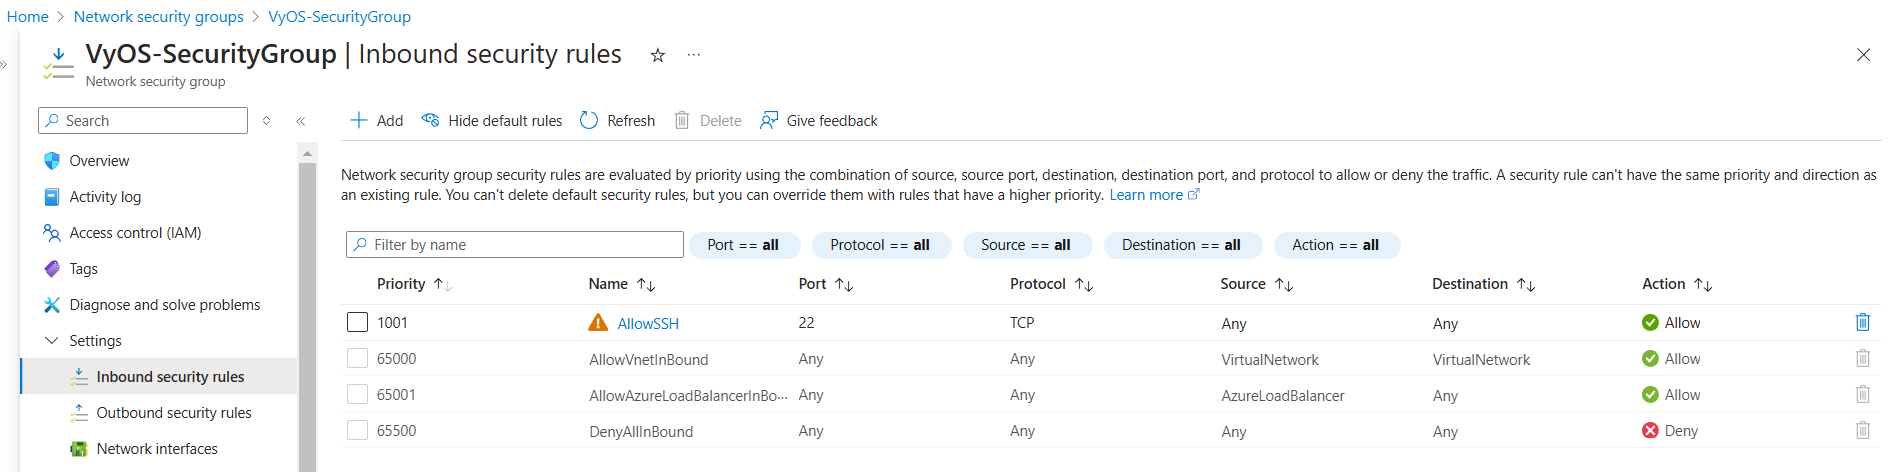
Add Rule Example:
Rule 1: AllowSSH
Port: 22
Protocol: TCP
Source: Any
Priority: 1001
Add Additional Rules:
You can add inbound rules based on your specific services, such as:
ESP
OpenVPN
WireGuard, etc.
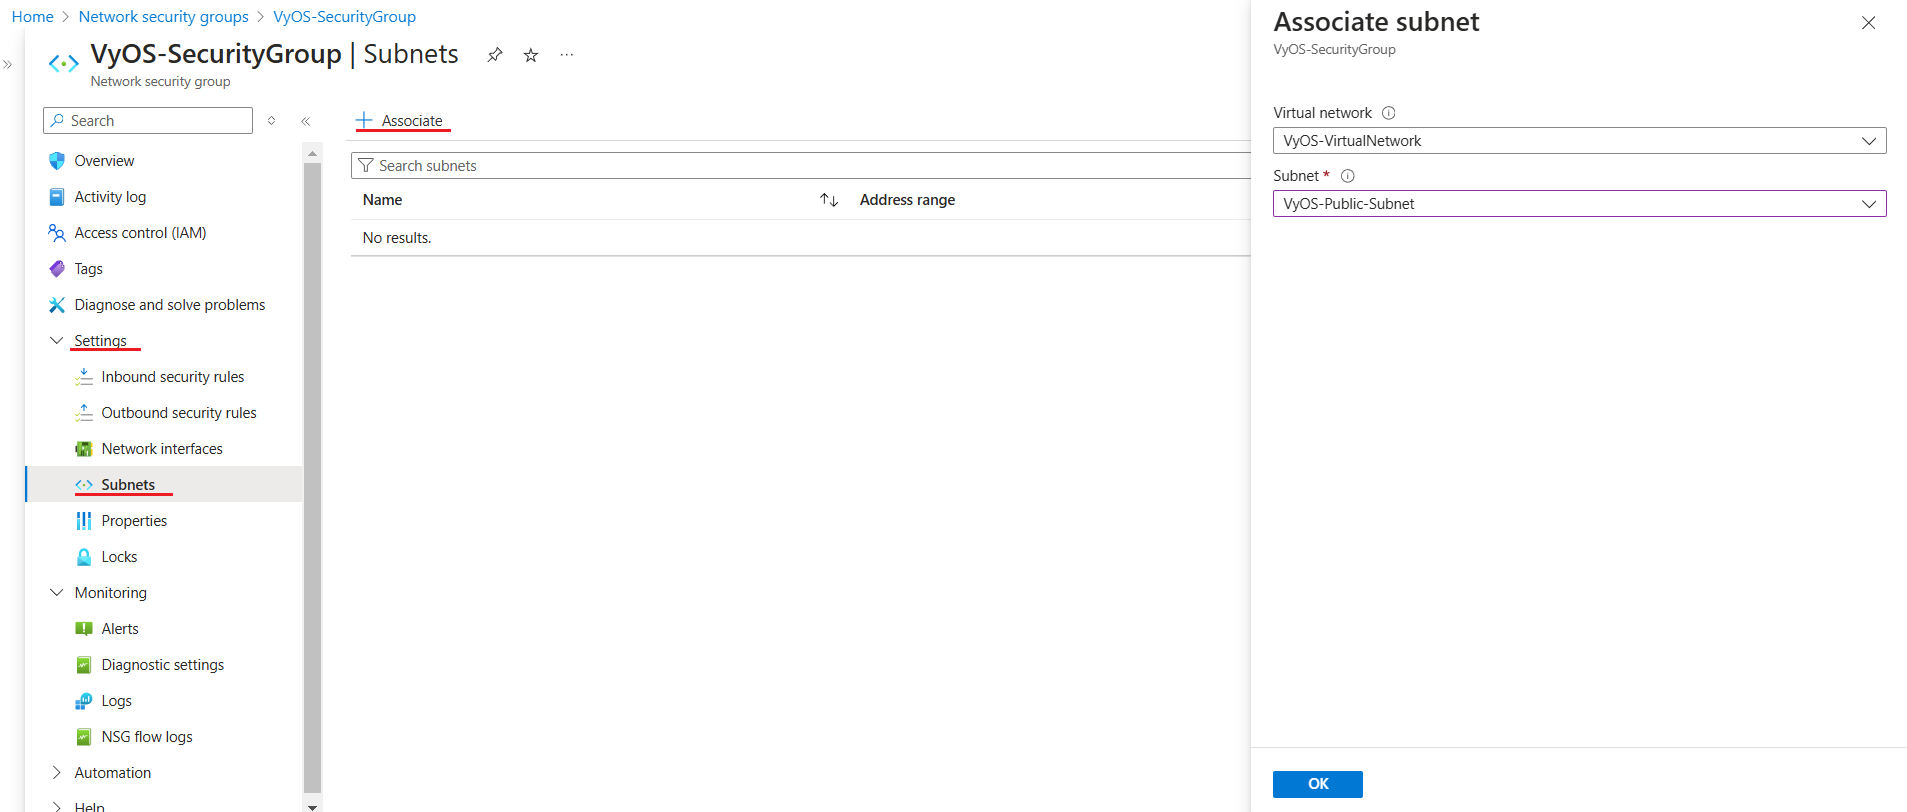
Associate subnets:
Navigate to the Network Security Groups, select Subnets click + Associate button. Then select your virtual network and the subnet to which you want to associate the NSG. Select OK:
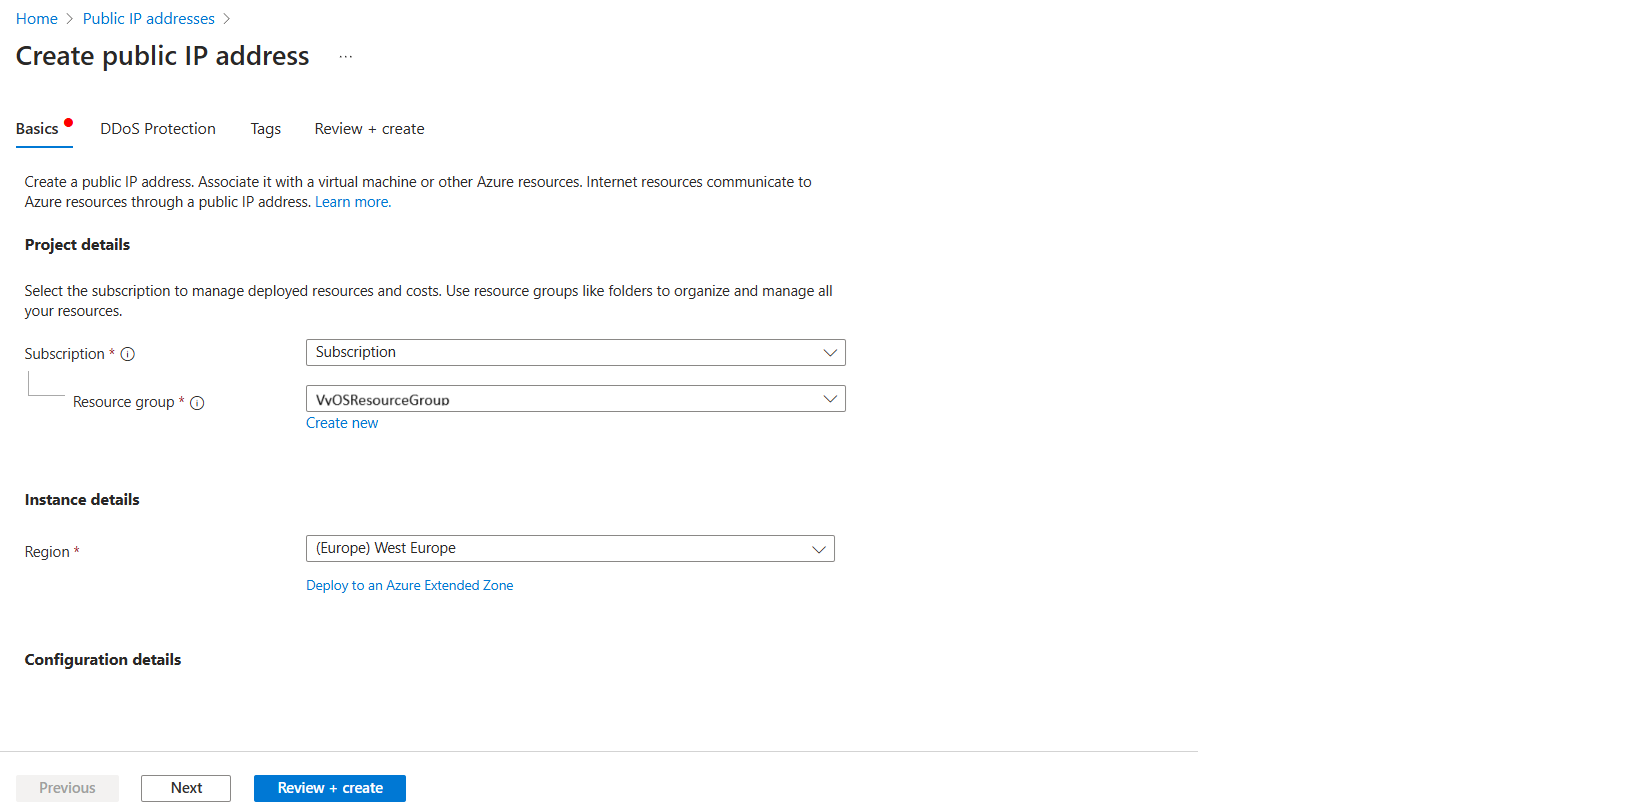
Step 4: Create Public IP Address
In the Azure Portal, search for and select Public IP Addresses.
On the Public IP Addresses page, select + Create.
Provide the following details:
Subscription: Select your Subscription
Resource Group: Select
VyOSResourceGroupRegion:
West Europe
Name:
VyOS-Pub-IPIP Version:
IPv4SKU:
StandardAvailability zone: Select Availability Zone
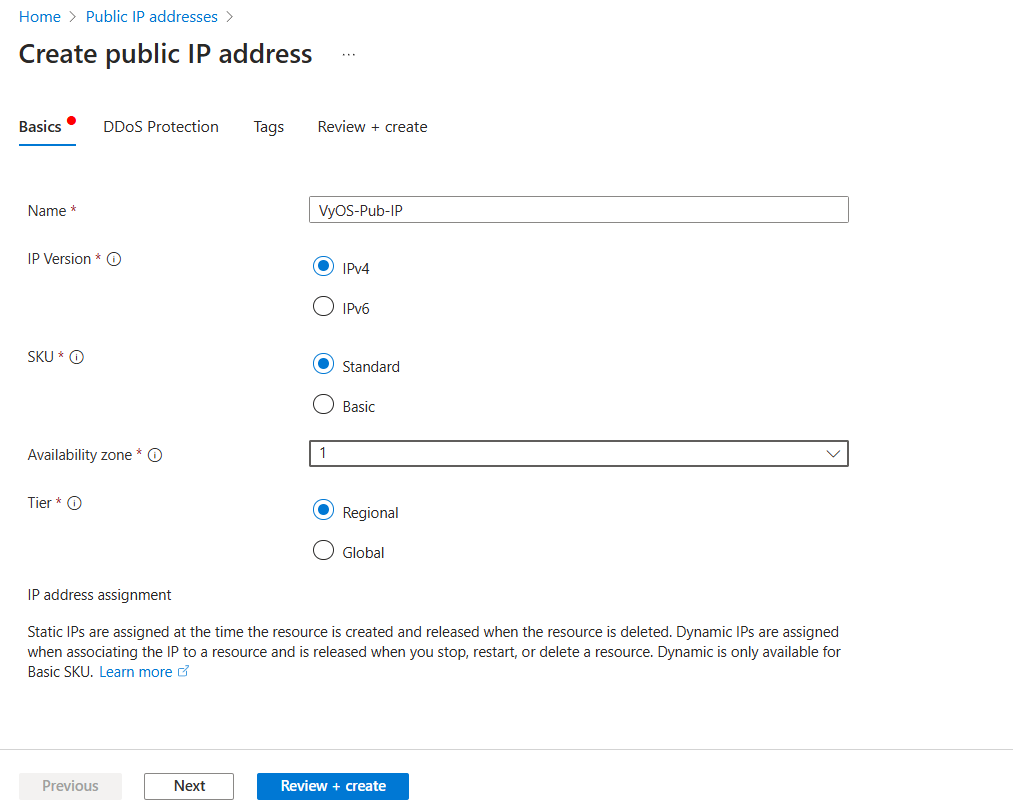
IP address assignment:
StaticIdle timeout (minutes)
30(max)
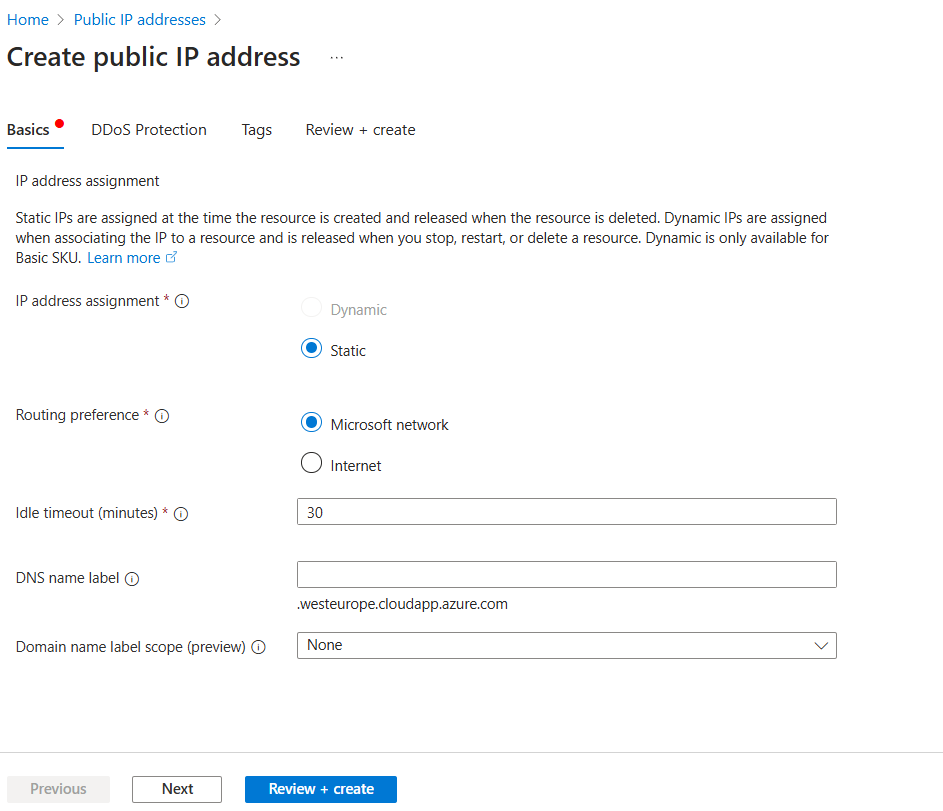
Click Review + Create, then Create.
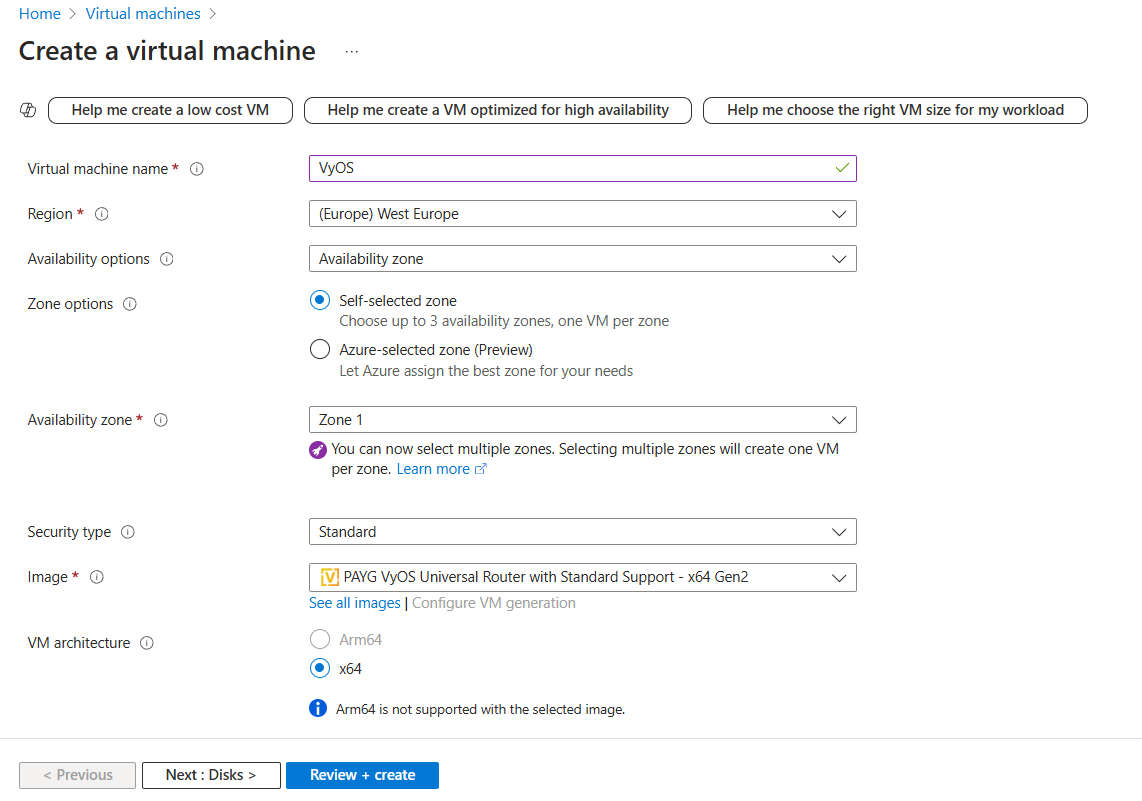
Step 5: Deploy the VyOS Network Virtual Machine (NVA)
In the Azure Portal, search for and select Virtual Machines.
On the Virtual Machines page, click + Create and select Azure virtual machine.
Provide the following details:
Subscription: Select your Subscription
Resource Group: Select
VyOSResourceGroupVirtual machine name: e.g.,
VyOSRegion: e.g.,
West EuropeSecurity type:
StandardImage:
VyOS(On the marketplace searchVyOSand choose the appropriate subscription).
Size: Select a VM size to support the workload that you want to run. The size that you choose then determines factors such as processing power, memory, and storage capacity.
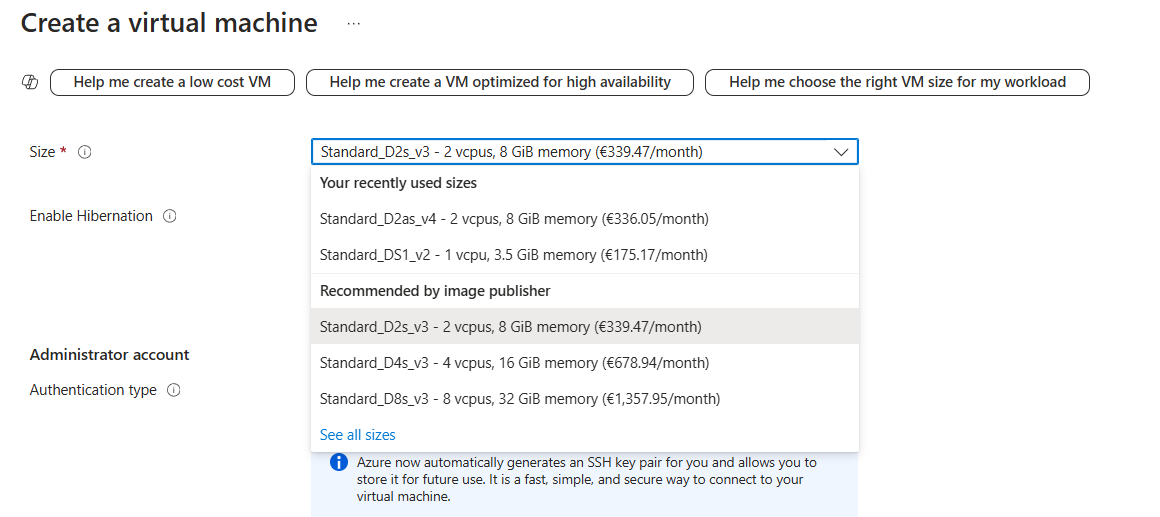
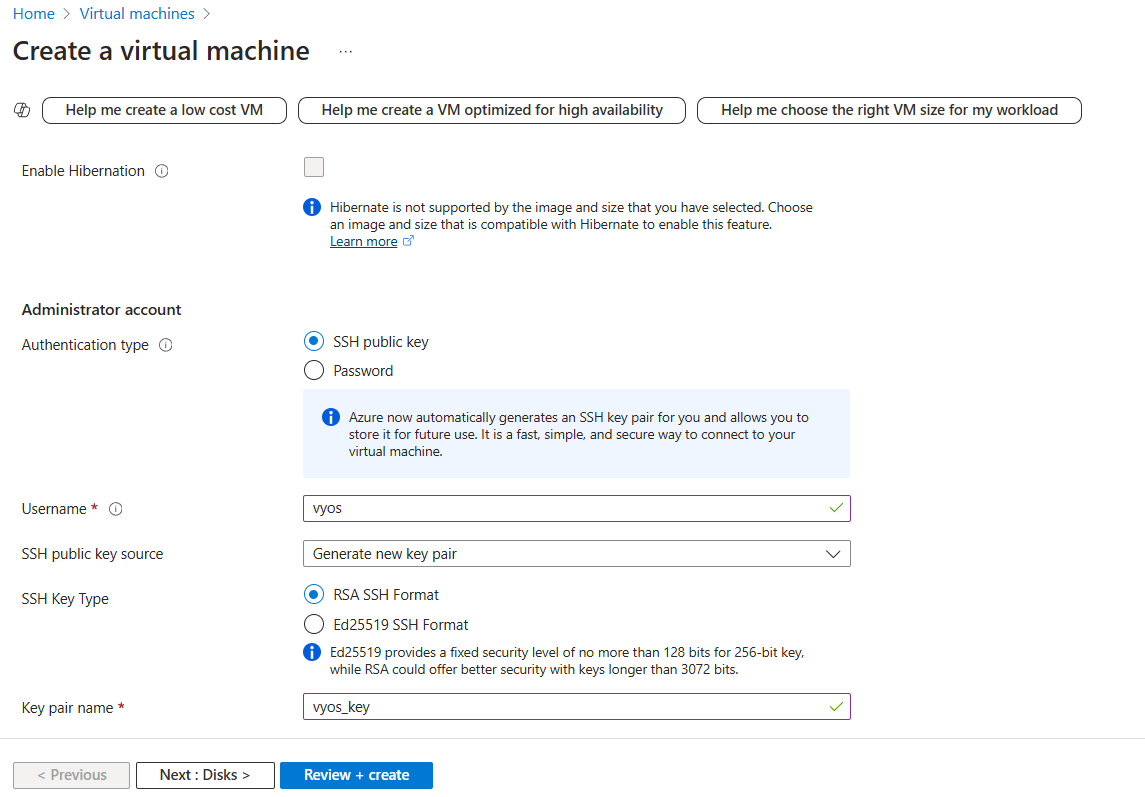
Password/SSH Key: Choose whether the administrator account will use username/password or SSH keys for authentication.
Username: The administrator username for the VM, e.g.,
vyos.SSH Key: You can use your existing SSH key pair or Azure automatically generates it for you and allows you to store it for future use.
Virtual network: Select
VyOS-VirtualNetwork.Subnet: Select
VyOS-Public-Subnet.Public IP: Select public IP address which created before
VyOS-Pub-IP.
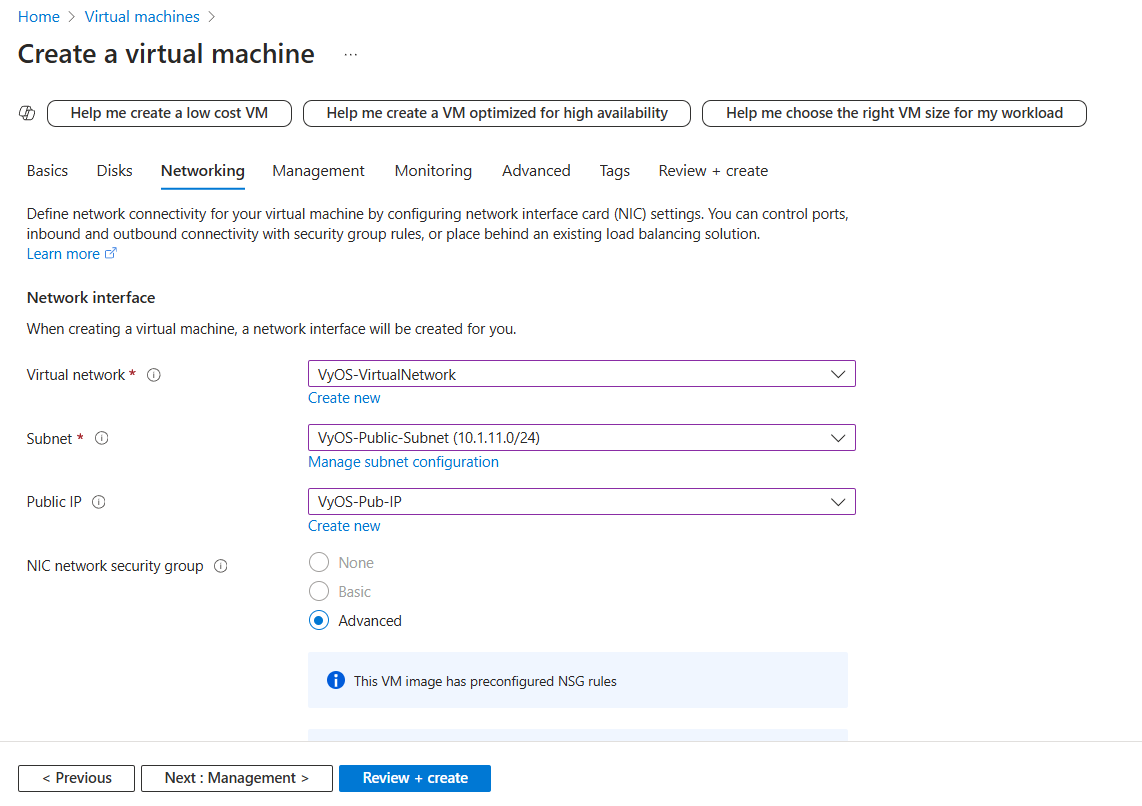
Configure network security group: Select existing Security Group
VyOS-SecurityGroup.
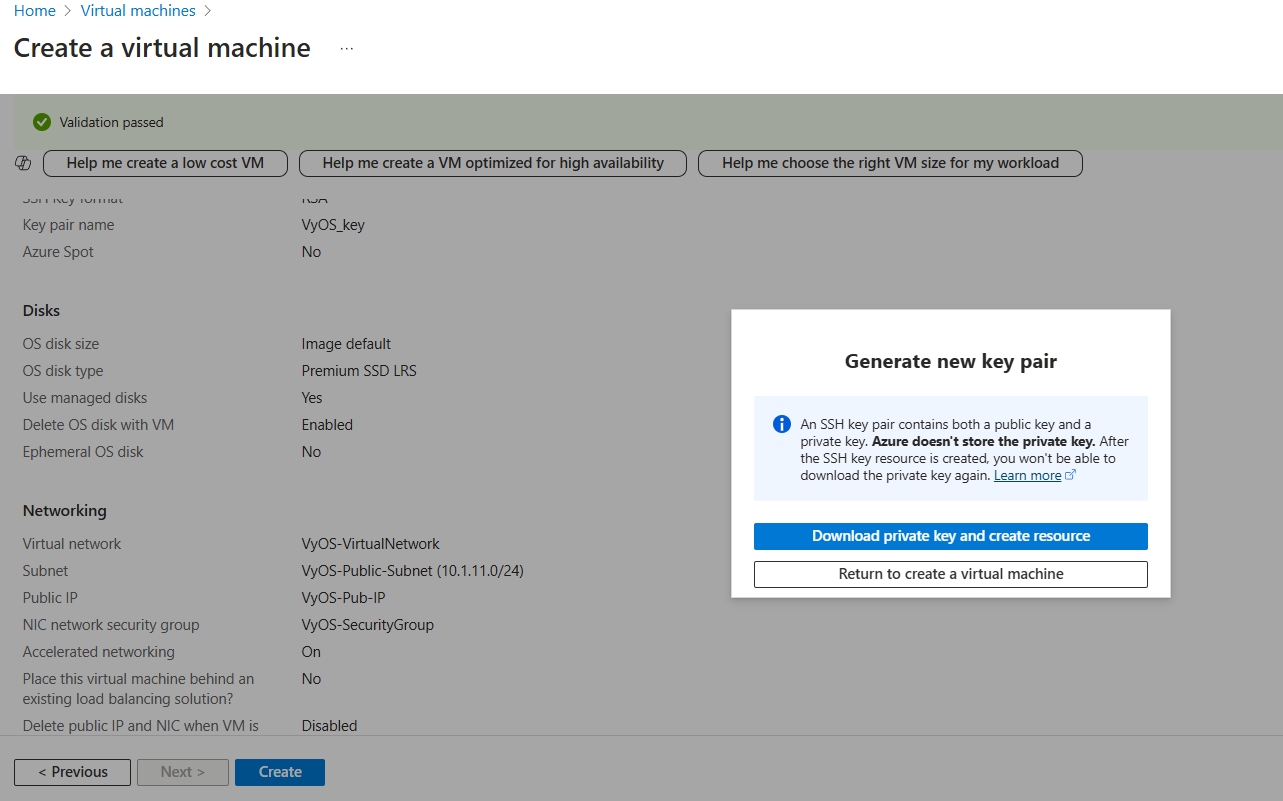
Click Review + Create, then Create.
Click Download the private key and create resource this will download private key to your computer and start creating Virtual Machine.
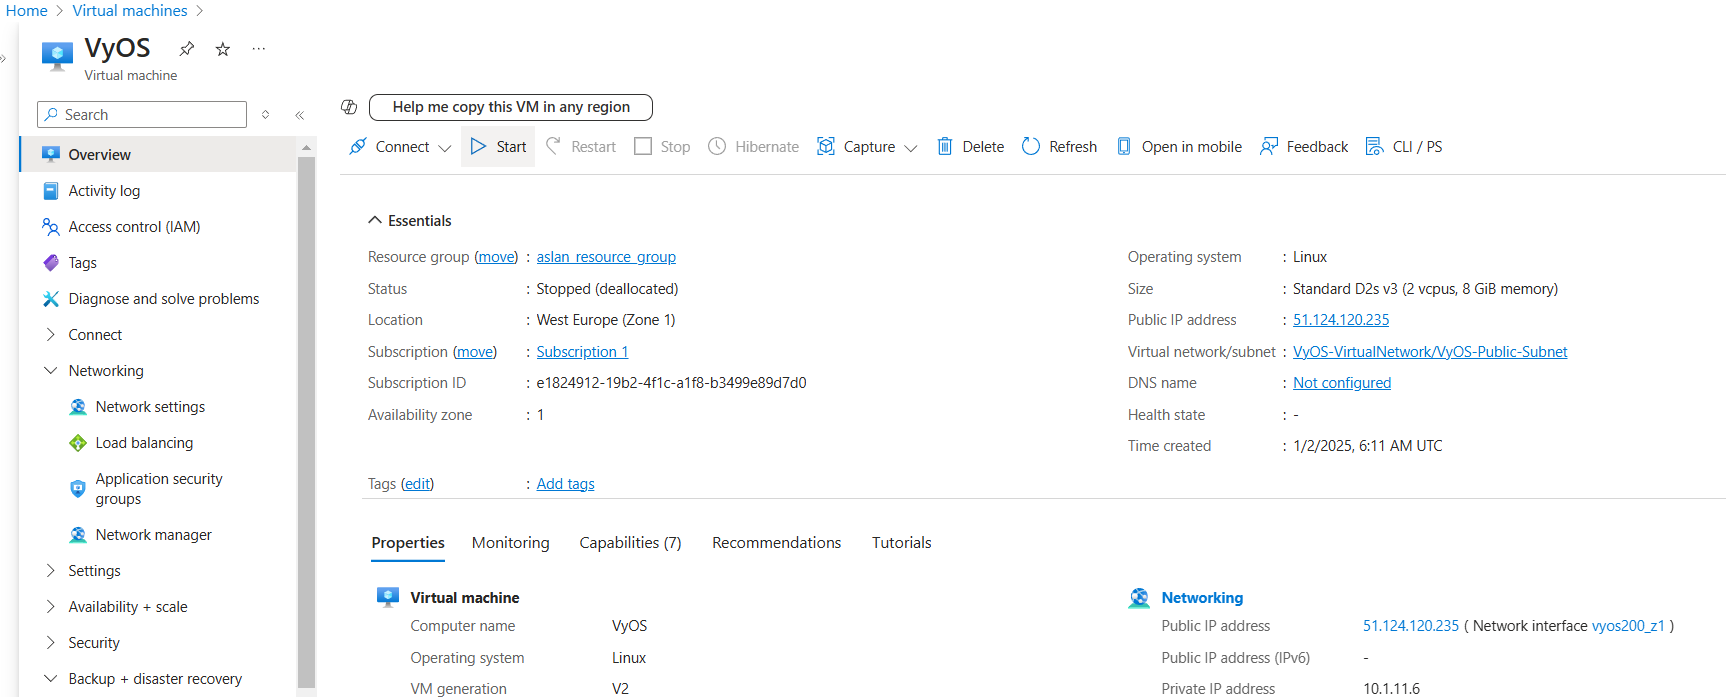
Wait until deployment is complete. After the deployment complete navigate to Virtual Machines click new created Virtual Machine. Check Public IP address.

Step 6: Access the VyOS instance
Access the VyOS instance using SSH protocol, Public IP Address, Private Key:
$ ssh vyos@51.124.120.235 -i vyos_key.pem
  vyos@VyOS:~$
Step 7: Enable IP Forwarding in Network Interface
This option allows the virtual machine on this network interface to act as a router and receive traffic addressed to other destinations.
On the Virtual Machines page, select
VyOSVM, under Networking tab select Network settings, click network interface.
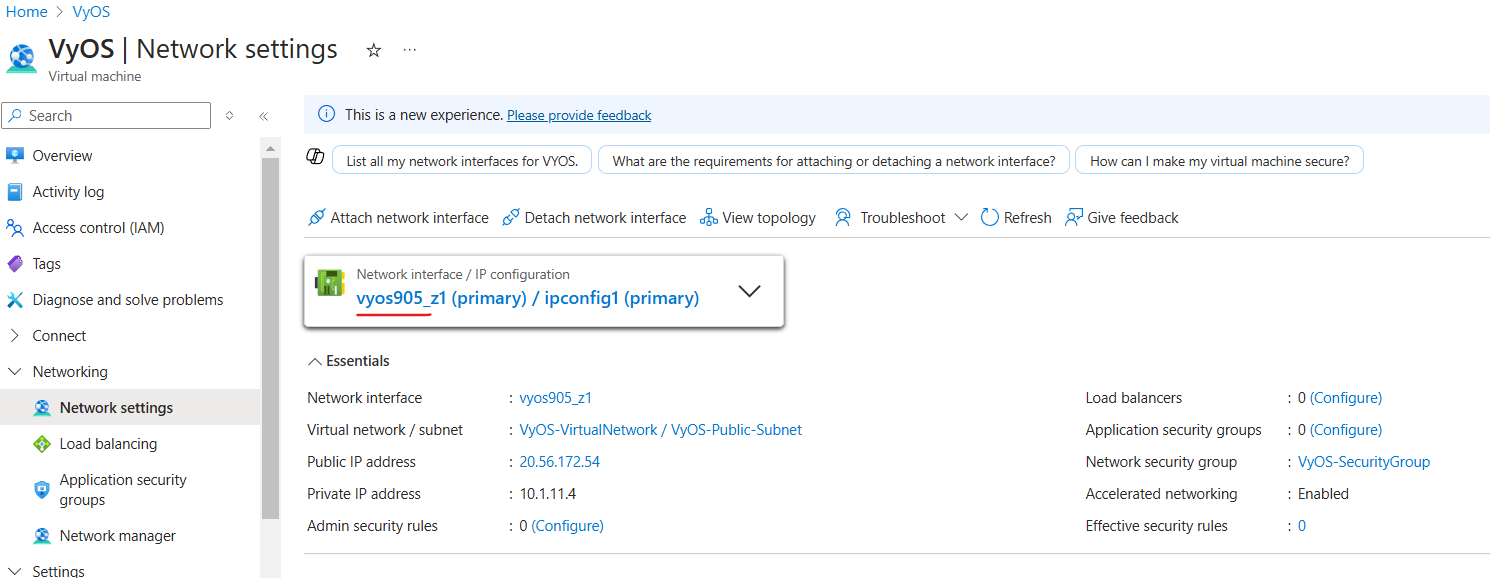
Enable IP forwarding and click the Apply button.
Step 8: Create and attach the second network interface (optional)
Now instance has been deployed with one eth0 WAN interface and want to add
new one. To add new interface an example eth1 LAN you need shutdown the
instance. Attach the interface in the Azure portal and then start the instance.
Note
Azure does not allow you attach interface when the instance in the Running state.
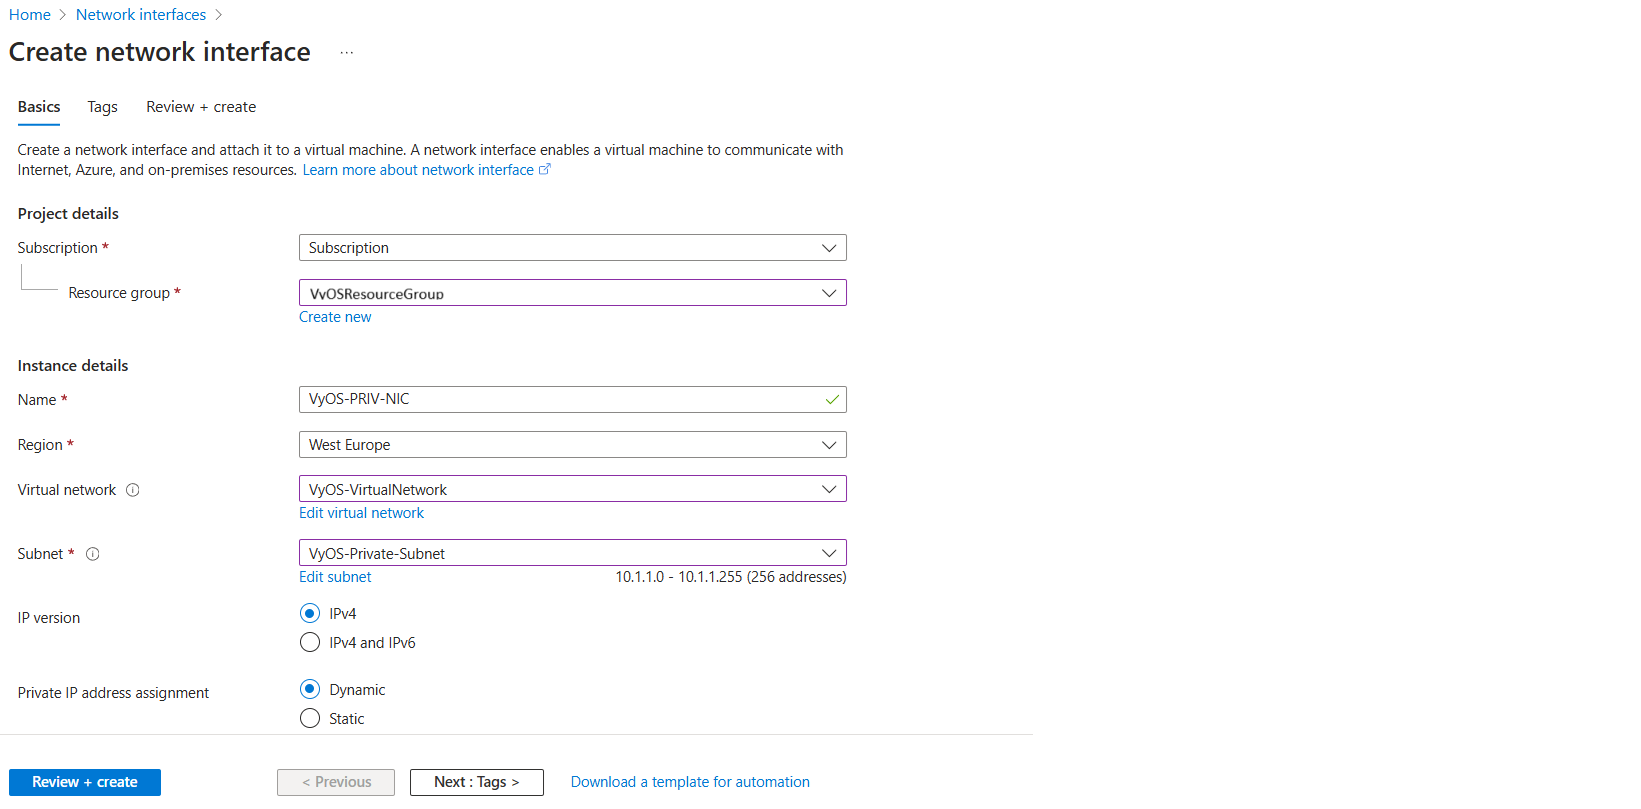
Create network interface:
In the Azure Portal, search for and select Network Interfaces.
On the Network Interfaces page, select + Create.
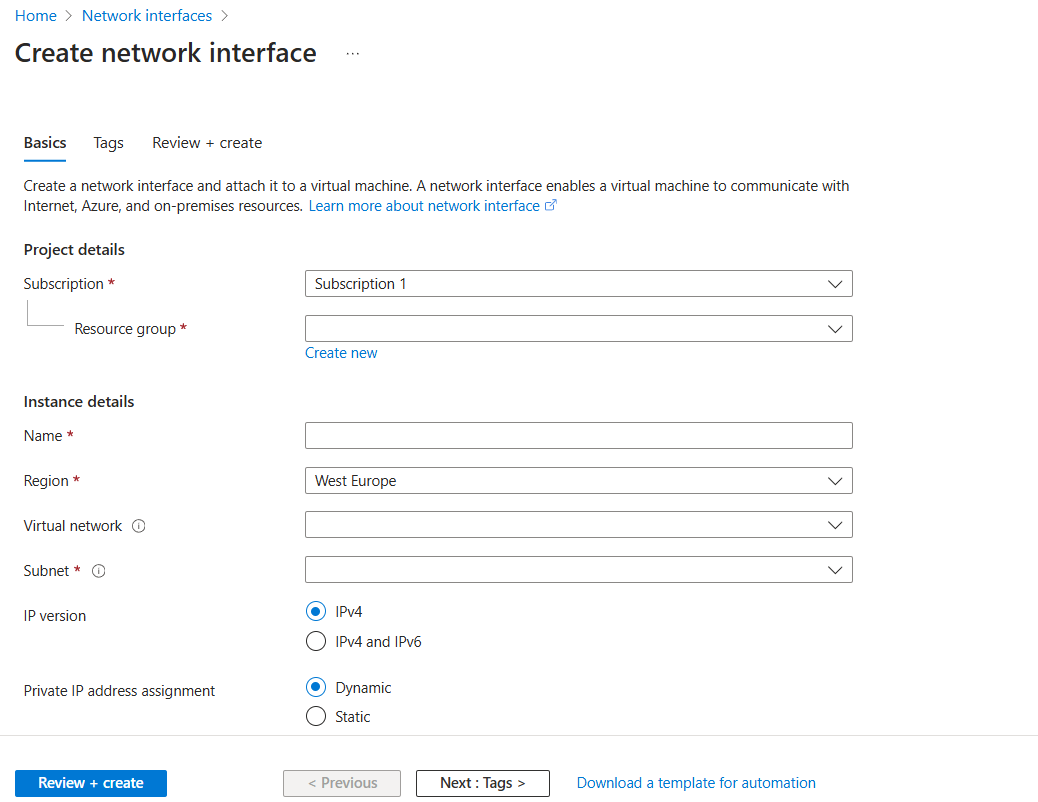
Subscription: Select your Subscription
Resource Group: Select
VyOSResourceGroupName:
VyOS-PRIV-NICSubnet:
VyOS-Private-SubnetPrivate IP:
DynamicClick Review + Create, then Create
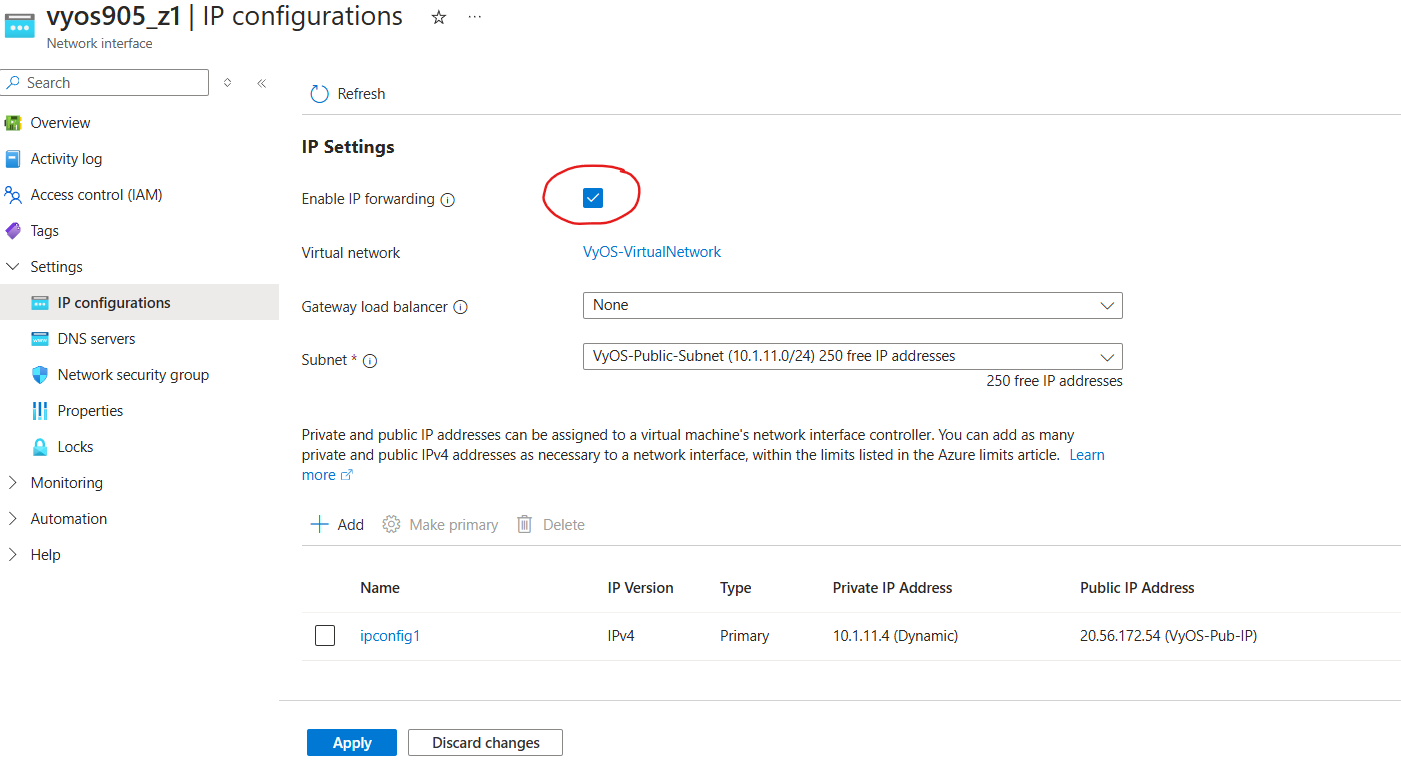
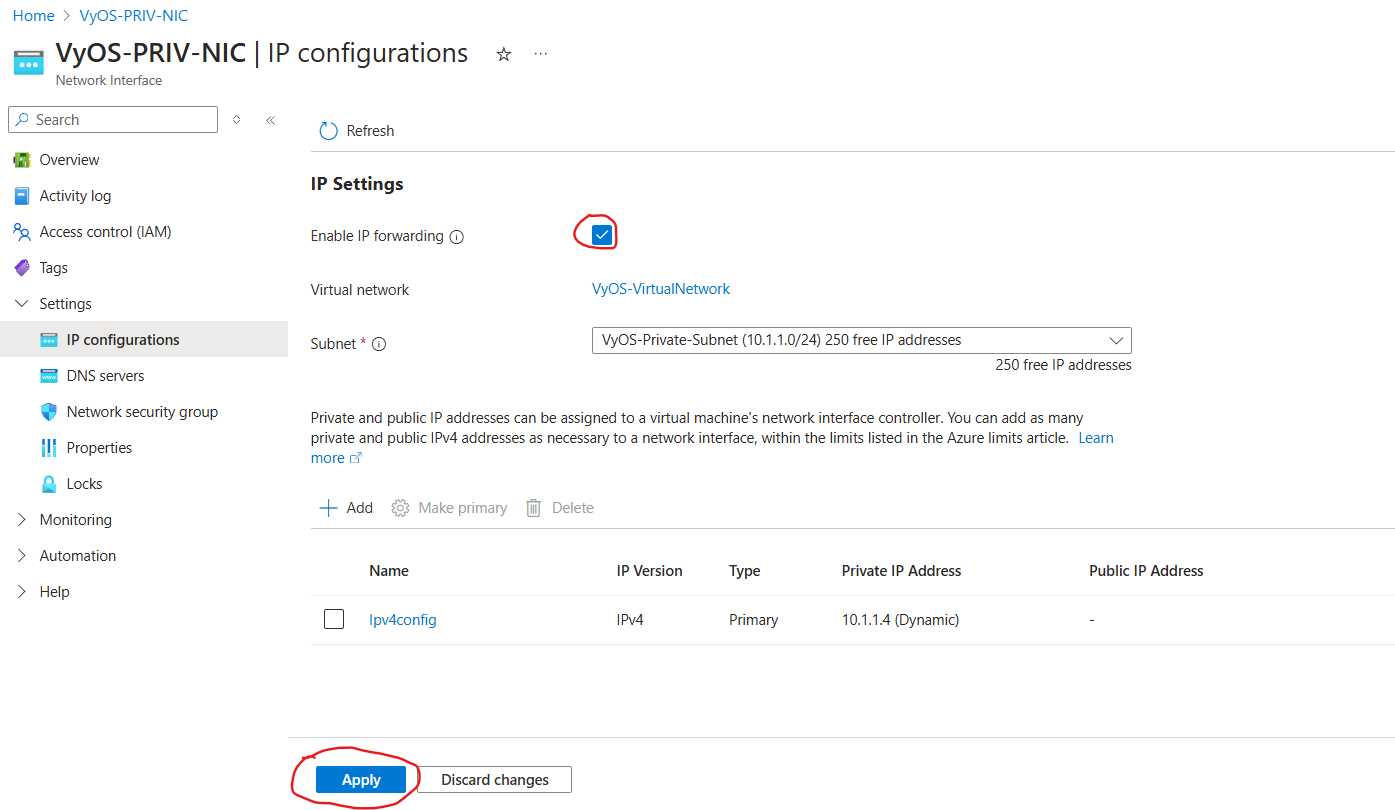
Enable IP Forwarding
Navigate to Network Interfaces select
VyOS-PRIV-NIC
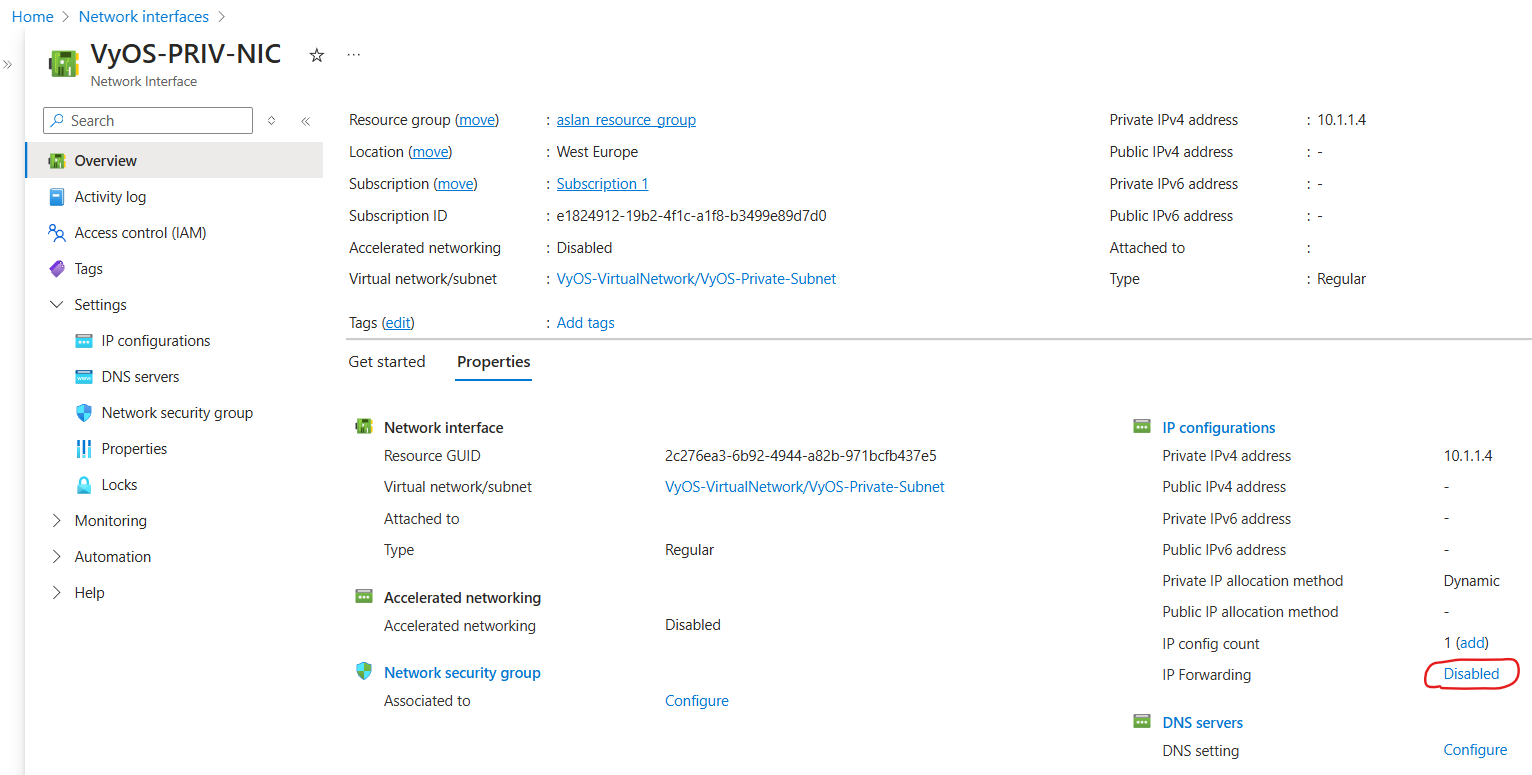
Go to Settings, select IP configurations. Enable IP Forwarding and select Apply.
Attach reate network interface:
Navigate to Virtual Machines, click new created Virtual Machine and click the Stop button
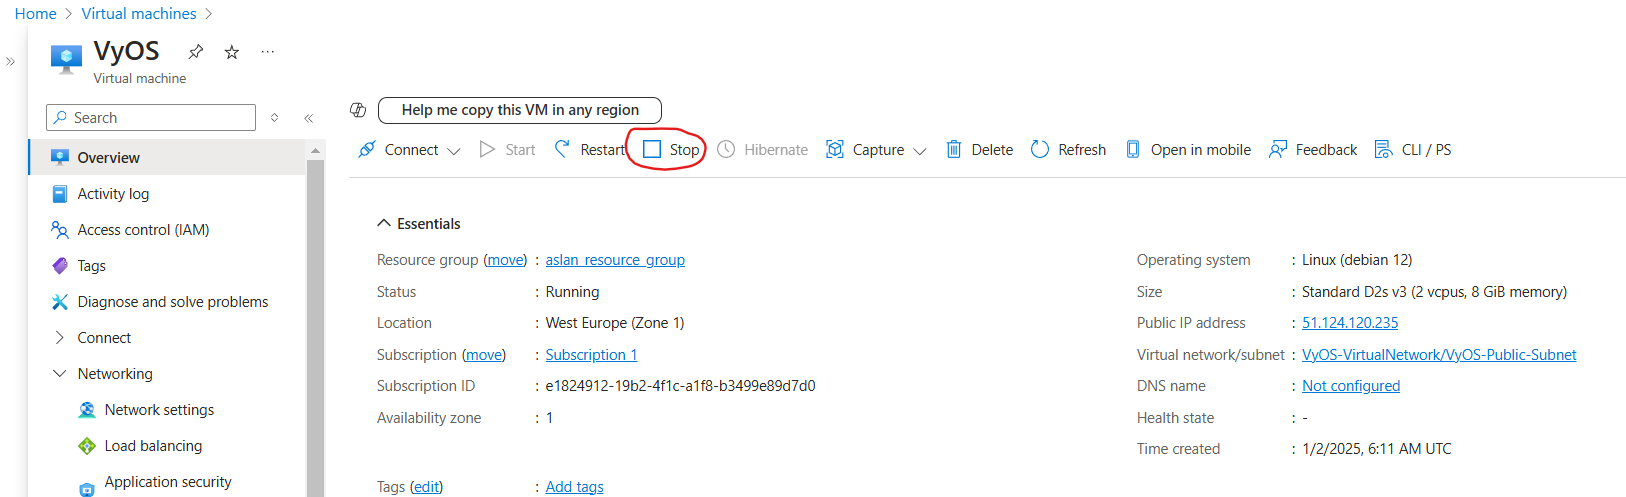
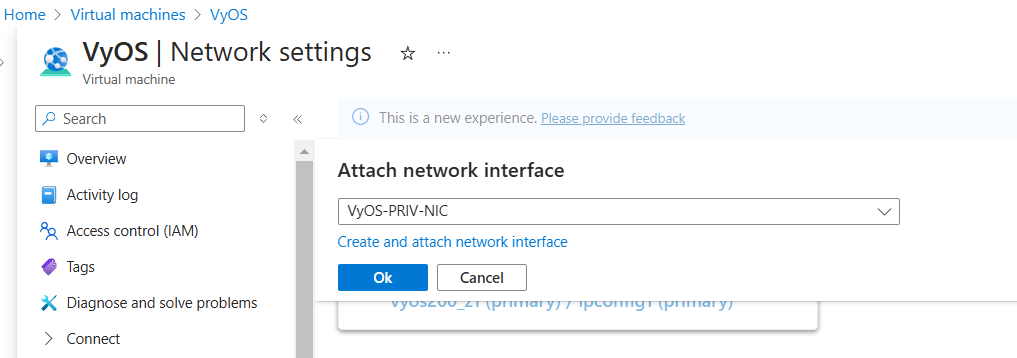
Go to Networking select Network settings and then select Attach network interface
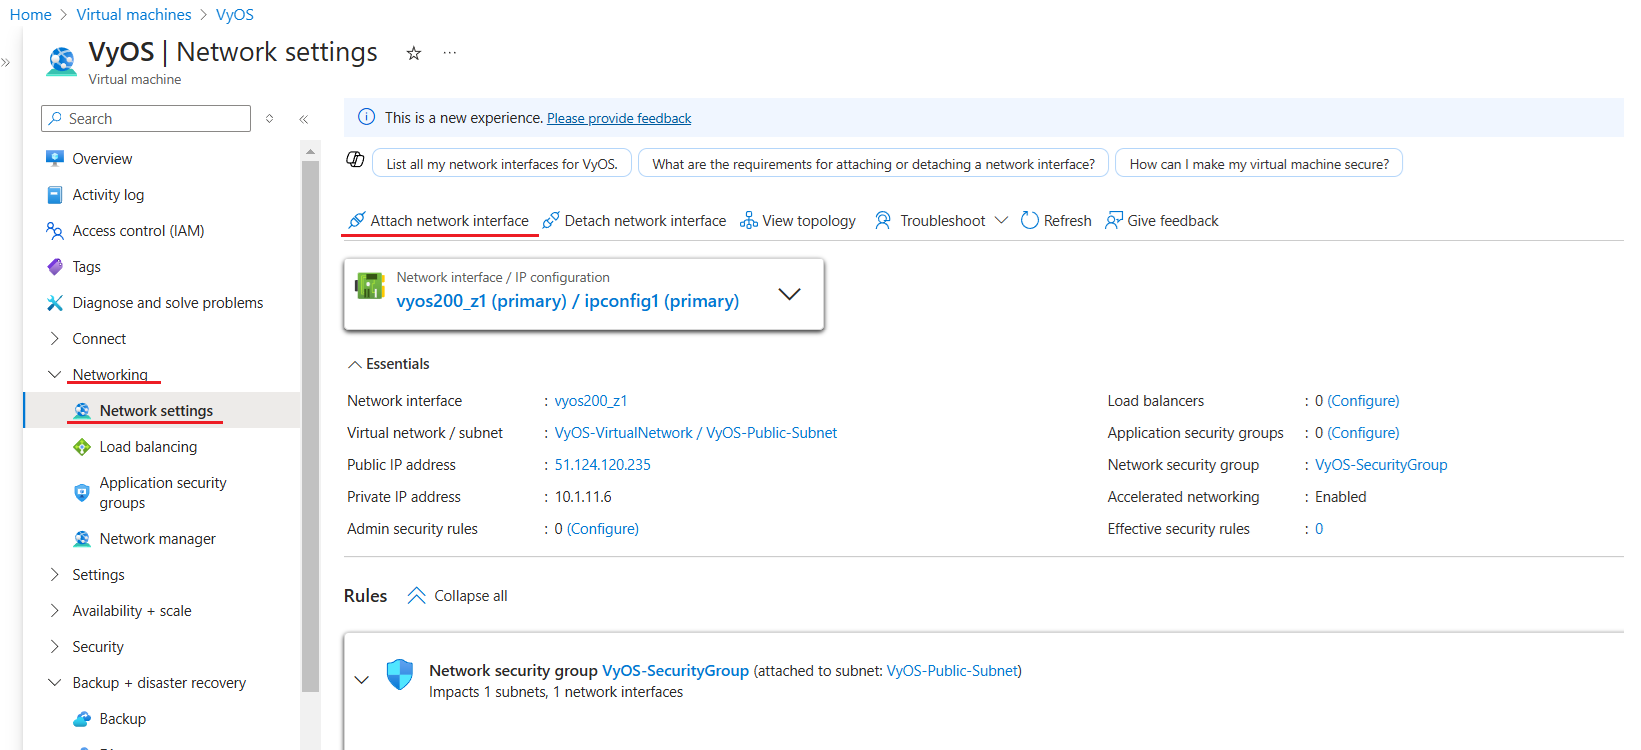
Select existing (before created) network interface
VyOS-PRIV-NICand click the OK button.
Now you have attached second interface to your instance and you can start Virtual Machine.
Go to Overview and click the Start button.
Setp 8: Absorbing Routes
To route traffic from your Virtual Network (VNET) through the LAN interface of your VyOS Network Virtual Appliance (NVA), you need to create and configure a custom route table in Azure.
Step-by-Step Instructions:
Navigate to Route Tables and click + Create.
Provide the following details:
Subscription: Select your Subscription
Resource Group: Select
VyOSResourceGroupName:
Route-VyOSRegion: e.g.,
West Europe
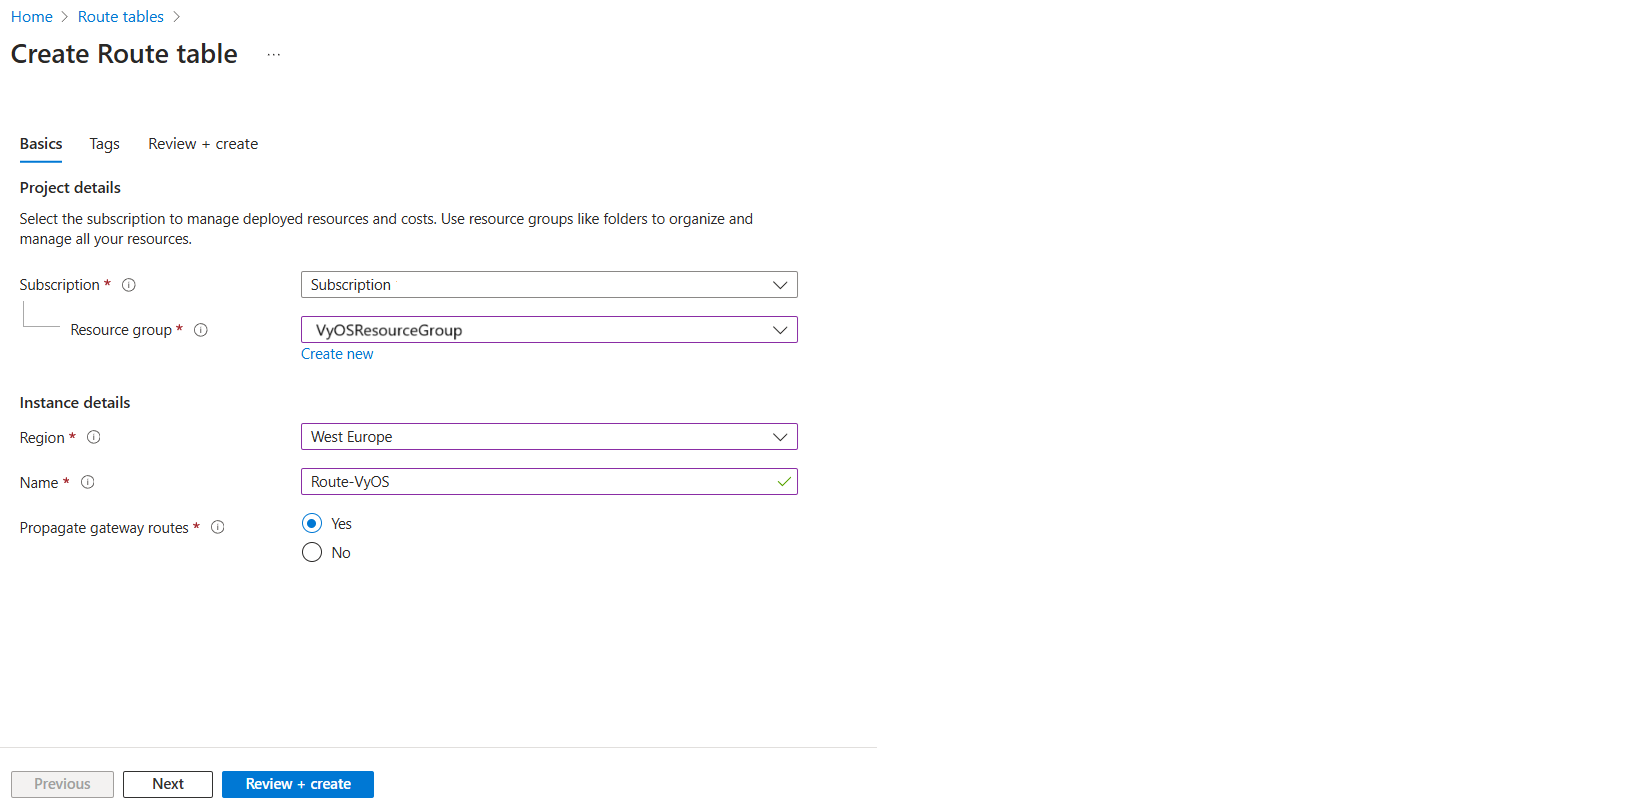
Click Review + Create, then Create.
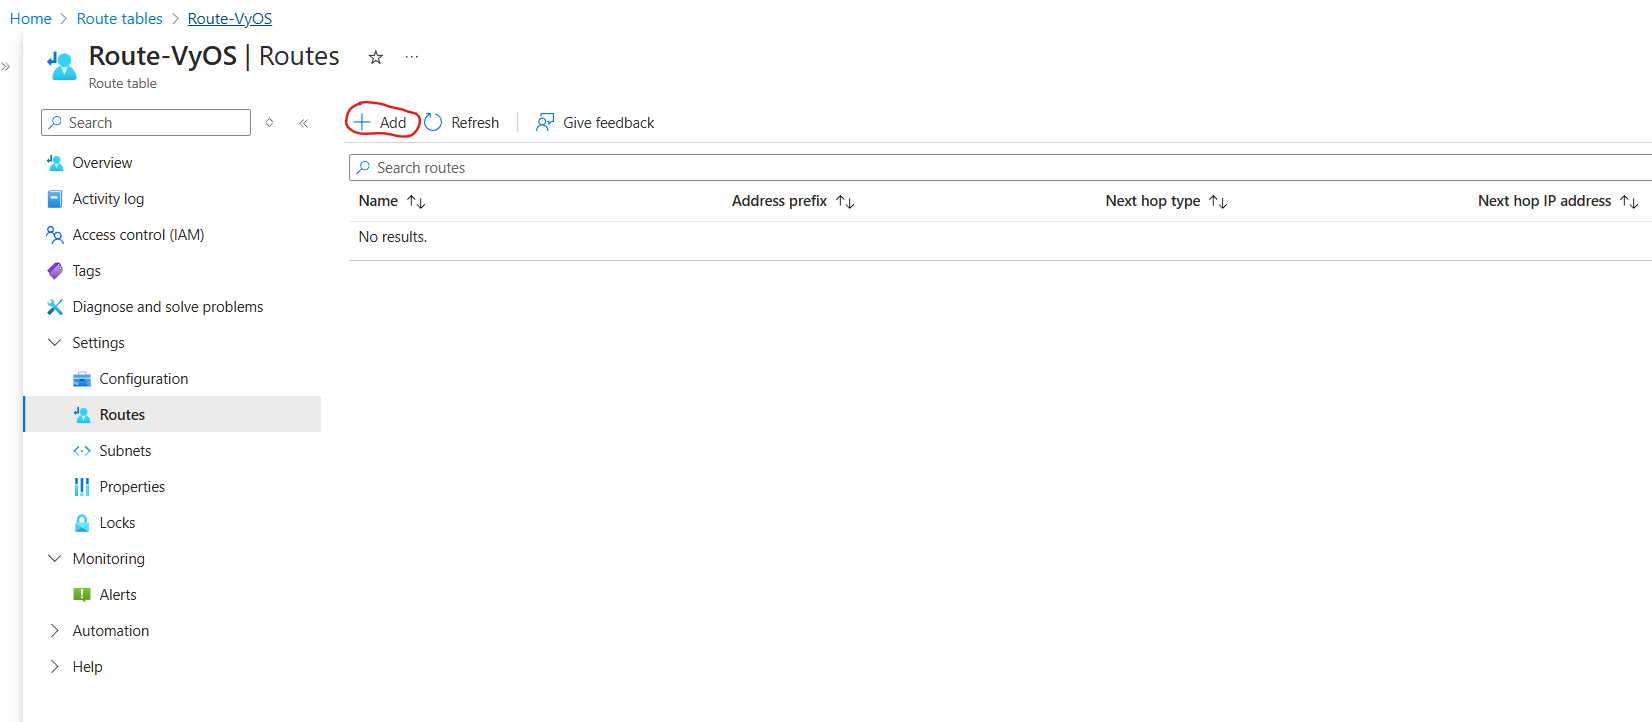
Add a Route:
Navigate to Route Tables and click the new created route (
Route-VyOS).Go to Routes and click + Add button.
Add following parameters:
Name:
Default-RouteDestination type:
IP AddressesDestination IP addresses/CIDR ranges:
0.0.0.0/0Next Hop Type:
Virtual ApplianceNext Hop IP Address:
10.1.11.4(The private Network Interface Card IP Address)
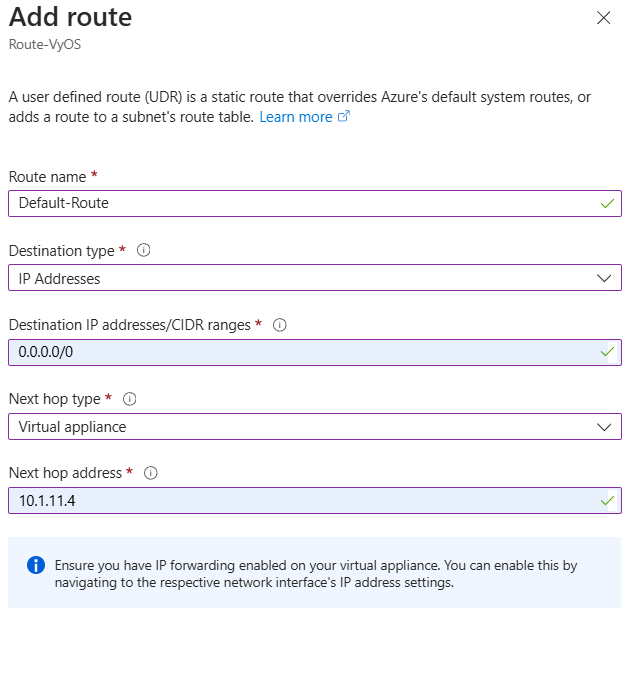
Click the Add button.
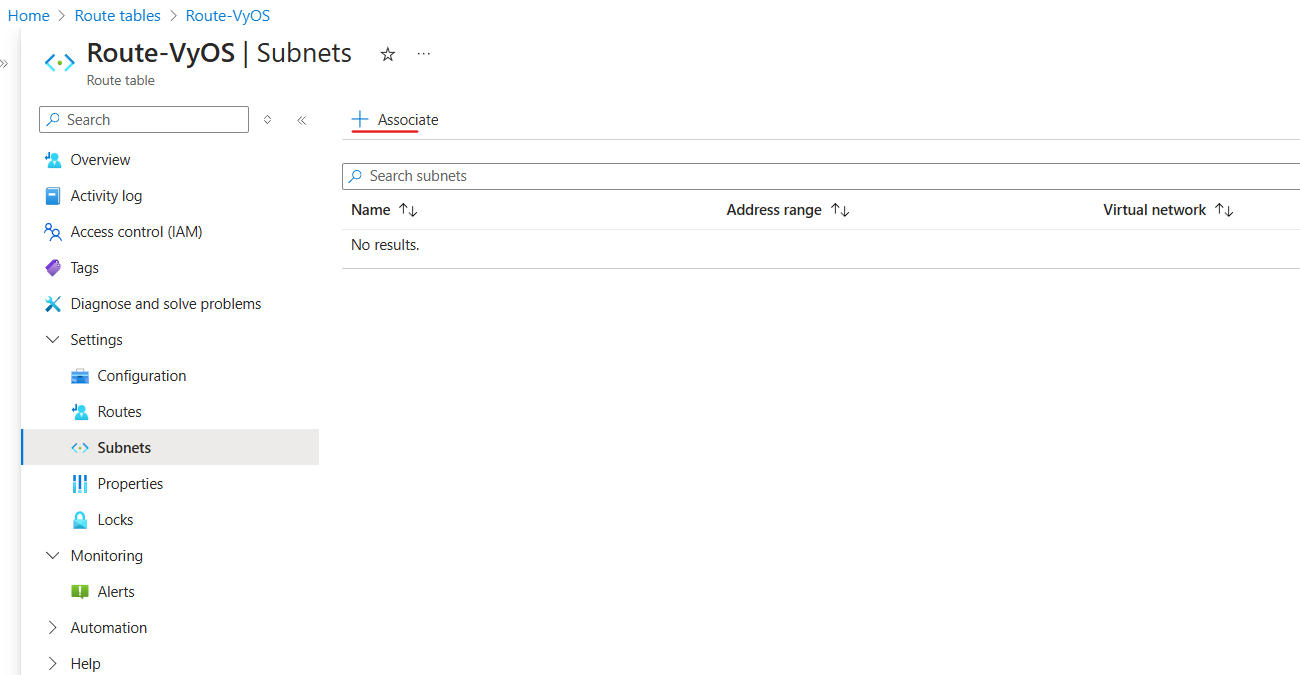
Associate the Route Table with subnet:
Navigate to Route Tables and click the new created route (
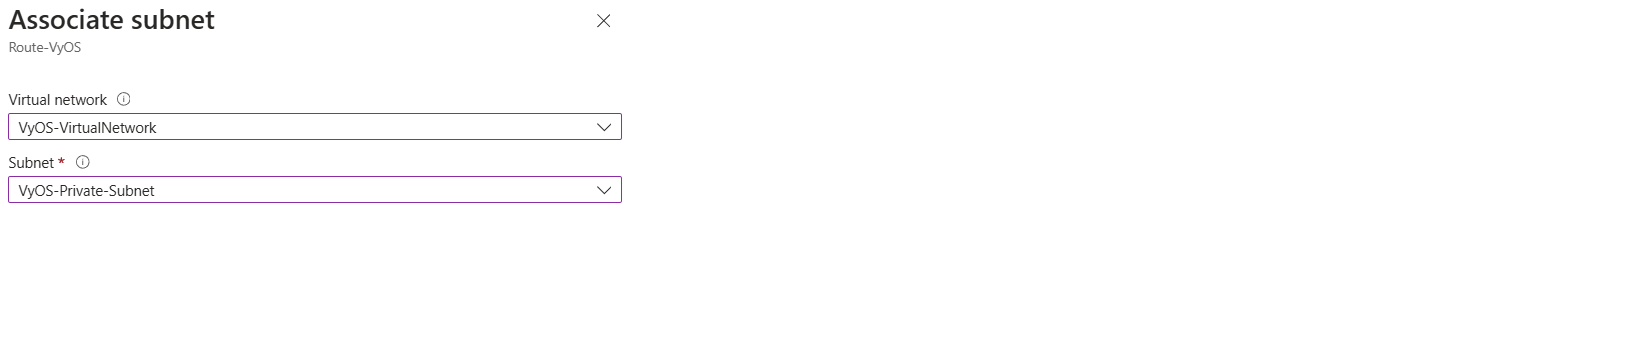
VyOSResourceGroup).Go to Subnets and click + Associate button.
Virtual network: Select
VyOS-VirtualNetwork.Subnet: Select
VyOS-Public-Subnet.
Note
If you want to create a new default route for VMs on the subnet, use Address Prefix 0.0.0.0/0 Also note that if you want to use this as a typical edge device, you’ll want masquerade NAT for the WAN interface.
Deploy VyOS Instance and Required Resources Automatically (via Terraform)
You can deploy a VyOS instance and its associated resources in Azure using Terraform modules available in the GitHub repository. All necessary parameters will be configured automatically, and you will receive management and access information from the outputs.
You can also edit/change these parameters based on your requirements.
Download/Clone the Repository following GitHub repository:
https://github.com/vyos/vyos-automation/tree/main/Terraform/Azure